

This simple graham cracker crust is a versatile base for many desserts, including cheesecakes, pies, and tarts. Made with just a few ingredients, it provides a sweet and crunchy texture that complements various fillings.
The recipe is quick and easy, perfect for beginners or anyone looking to save time in the kitchen.
Creating the Perfect Graham Cracker Crust
A graham cracker crust serves as a delightful foundation for various desserts, especially cheesecakes and pies. Its sweet and crunchy texture pairs wonderfully with creamy fillings, making it a favorite among dessert lovers.
To achieve that golden-brown color, the crust is made from crushed graham crackers combined with sugar and melted butter. This simple mixture is pressed into a 9-inch pie pan, creating a base that is both sturdy and delicious.
Ingredients You’ll Need
The beauty of this crust lies in its minimal ingredients. You will need 1 1/2 cups of graham cracker crumbs, 1/4 cup of granulated sugar, and 1/2 cup of unsalted butter, melted. A pinch of salt can be added for an extra flavor boost.
These ingredients come together quickly, making it an excellent choice for those who want to whip up a dessert in no time. Just a few simple steps lead to a crust that’s ready for your favorite filling.
Preparation Steps
Start by preheating your oven to 350°F (175°C) if you plan to bake the crust. In a mixing bowl, combine the graham cracker crumbs, sugar, melted butter, and optional salt. Mix until the crumbs are evenly coated.
Next, pour the mixture into your pie pan. Use the back of a measuring cup or your fingers to press the crumbs firmly and evenly across the bottom and up the sides of the pan. This step is crucial for ensuring a well-formed crust.
Baking or No-Bake Options
If you choose to bake the crust, place it in the preheated oven and allow it to bake for 8-10 minutes until it turns lightly golden. Once baked, let it cool before adding your filling.
For a no-bake option, simply refrigerate the crust for at least 30 minutes to set. This method is perfect for those warm days when you want a cool dessert without turning on the oven.
Filling Your Crust
Once your crust is ready, the possibilities for filling are endless. A creamy cheesecake filling is a classic choice, providing a rich contrast to the crunchy crust. Topping it with fresh berries adds a burst of color and flavor, making the dessert visually appealing and delicious.
Consider using strawberries, blueberries, or raspberries for a refreshing touch. The combination of the creamy filling and the tartness of the berries creates a delightful balance that is sure to impress.
Serving Suggestions
When it comes to serving, this dessert is perfect for gatherings or special occasions. Slice it into wedges and serve chilled for a refreshing treat. Pair it with a dollop of whipped cream or a scoop of vanilla ice cream for an extra indulgence.
Its rustic presentation on a wooden table enhances the inviting nature of the dessert, making it a centerpiece that draws everyone in. Enjoy the compliments that come your way as you serve this delightful creation!
Easy 9-Inch Graham Cracker Crust Recipe
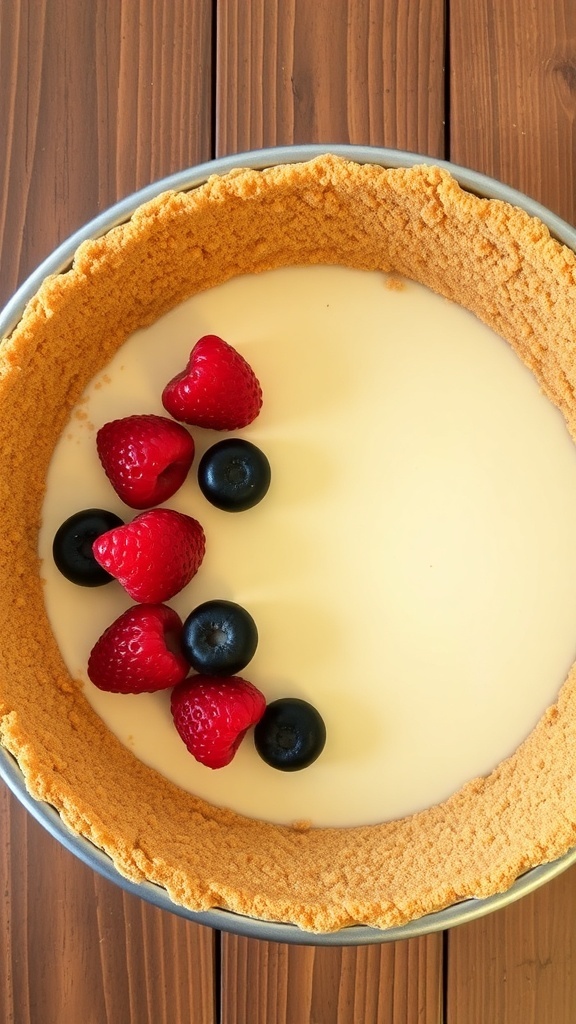
This graham cracker crust is made from crushed graham crackers, sugar, and melted butter, pressed into a 9-inch pie pan. It takes about 15 minutes to prepare and can be baked or used as a no-bake crust.
Ingredients
- 1 1/2 cups graham cracker crumbs
- 1/4 cup granulated sugar
- 1/2 cup unsalted butter melted
- 1/4 teaspoon salt optional
Instructions
- Preheat the Oven: If baking the crust, preheat your oven to 350°F (175°C).
- Combine Ingredients: In a mixing bowl, combine graham cracker crumbs, sugar, melted butter, and salt. Mix until the crumbs are evenly coated.
- Press into Pan: Pour the mixture into a 9-inch pie pan. Use the back of a measuring cup or your fingers to press the crumbs firmly and evenly across the bottom and up the sides of the pan.
- Bake (Optional): If baking, place the crust in the preheated oven and bake for 8-10 minutes until lightly golden. Remove from the oven and let it cool before adding your filling.
- No-Bake Option: If using as a no-bake crust, simply refrigerate the crust for at least 30 minutes to set before filling.
Cook and Prep Times
- Prep Time: 5 minutes
- Cook Time: 10 minutes
- Total Time: 15 minutes
- Servings: 8 servings
- Calories: 150kcal
- Fat: 8g
- Protein: 2g
- Carbohydrates: 19g