

Creating 3D printed Christmas tree ornaments is a fun and creative way to personalize your holiday decorations. With a 3D printer, you can design and produce unique ornaments that reflect your style and interests.
This guide will provide you with practical steps to create your own ornaments, including design ideas, materials needed, and tips for printing.
Creating Festive 3D Printed Ornaments
3D printing offers a unique opportunity to craft personalized Christmas tree ornaments that stand out.
With a bit of creativity and the right tools, you can design ornaments that reflect your individual style and festive spirit.
From stars to snowflakes, the possibilities are endless, allowing you to bring your holiday vision to life.
Designing Your Ornaments
The first step in this creative process involves using CAD software to design your ornaments.
Consider incorporating traditional shapes like stars and snowflakes, or even adding personalized initials for a special touch.
This phase can be a delightful experience, as you can tailor each ornament to fit your holiday theme.
Once your designs are ready, you’ll need to prepare them for printing.
This involves slicing the model using software that converts your design into a format suitable for your 3D printer.
Materials Needed for Printing
To embark on your ornament-making journey, gather the necessary materials.
You will need a 3D printer and filament, typically PLA or ABS, which are both popular choices for creating durable ornaments.
Additionally, having CAD software like Tinkercad or Fusion 360 will aid in your design process, while slicing software such as Cura or PrusaSlicer will help prepare your models for printing.
Optional materials include sandpaper for smoothing out any rough edges and paint or finishing materials to add color and detail to your ornaments.
Don’t forget string or hooks for hanging your creations on the Christmas tree!
The Printing Process
After designing and slicing your models, it’s time to print.
Load your filament into the 3D printer and initiate the printing process.
Keep an eye on the print to ensure everything is going smoothly, as this will help you catch any potential issues early.
The printing time can vary significantly based on the complexity of your designs, ranging from one to six hours.
Patience is key, as the end result will be worth the wait!
Finishing Touches
Once your ornaments are printed, you can enhance their appearance with some finishing touches.
Sanding the edges can provide a smoother finish, making them more visually appealing.
If you wish to add a splash of color, consider painting your ornaments or applying a sealant for a polished look.
Finally, attach string or hooks to each ornament, making them ready to hang on your beautifully decorated Christmas tree.
These personalized touches will create a warm and inviting holiday atmosphere.
Showcasing Your Creations
Display your colorful 3D printed ornaments proudly on your Christmas tree.
The vibrant colors and intricate designs will surely catch the eye of your guests and add a unique flair to your holiday decorations.
Each ornament tells a story, reflecting your creativity and festive spirit.
As you gather around the tree, the soft lighting will enhance the beauty of your handmade ornaments, creating a cozy and joyful environment.
This holiday season, let your creativity shine through your 3D printed creations!
DIY 3D Printed Christmas Ornaments
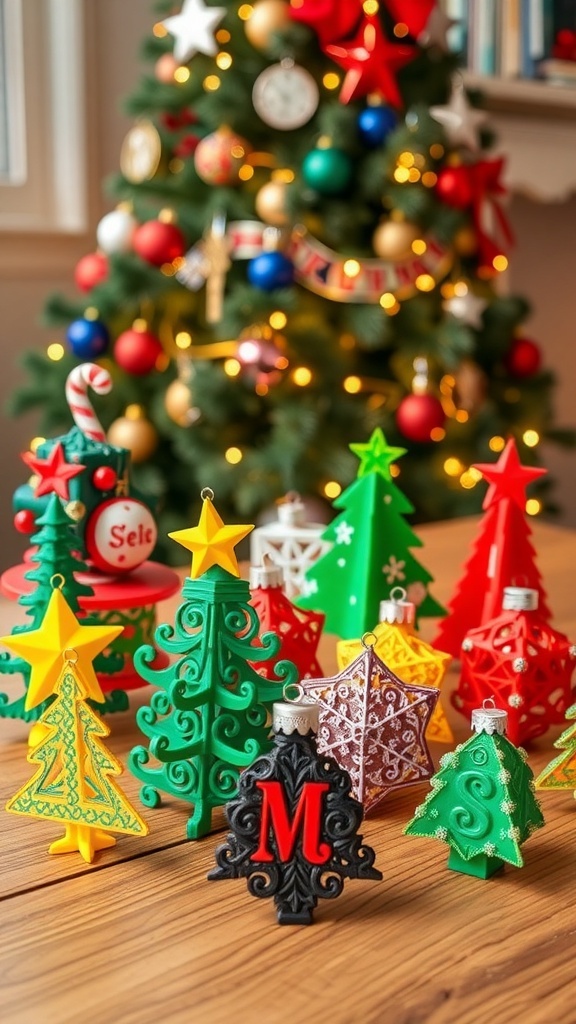
These 3D printed ornaments can be customized in various shapes and sizes, from traditional baubles to intricate designs. The process typically involves using CAD software to create your design, slicing the model for printing, and then finishing the printed ornaments for display on your Christmas tree.