

This artisan bread recipe yields a crusty loaf with a soft, chewy interior. Perfect for sandwiches or as a side to soups and salads, it’s made with simple ingredients and requires minimal effort.
The process involves a long fermentation period, which enhances the flavor and texture of the bread. With just a few basic steps, you can create a delicious homemade loaf.
Artisan Bread: A Rustic Delight
There’s something truly special about a freshly baked artisan bread loaf. The golden-brown crust, with its beautifully cracked surface, invites you to slice into it and discover the soft, airy interior.
This bread not only serves as a delicious accompaniment to meals but also stands out as a centerpiece on any dining table. The rustic presentation, enhanced by sprigs of fresh herbs and a small bowl of olive oil for dipping, adds to its charm and appeal.
The Magic of Long Fermentation
The secret to achieving that perfect crust and tender crumb lies in the fermentation process. Allowing the dough to rise for an extended period enhances the flavor profile and texture of the bread.
During this time, the yeast works its magic, developing complex flavors that make each bite a delightful experience. The long rise also contributes to the bread’s airy structure, ensuring that it’s not just crusty on the outside but also soft and chewy on the inside.
Simple Ingredients, Remarkable Results
One of the best aspects of artisan bread is its simplicity. With just a few basic ingredients—flour, salt, yeast, and warm water—you can create something extraordinary.
These humble components come together to form a dough that transforms into a loaf that rivals those from the finest bakeries. The beauty of this recipe is that it requires minimal effort, making it accessible for both novice and experienced bakers alike.
Perfecting the Crust
The crust is a defining feature of artisan bread. Achieving that crispy exterior involves a few key techniques, including high hydration dough and steam during the baking process.
When baked in a preheated Dutch oven, the steam helps create a crust that is both crunchy and golden brown. This method locks in moisture, ensuring the interior remains soft and airy, making each slice a delight.
Serving Suggestions
Once your artisan bread is baked to perfection, the possibilities for serving are endless.
Pair it with a bowl of olive oil for dipping, or enjoy it alongside soups and salads. The bread also makes an excellent base for sandwiches, allowing the flavors of your fillings to shine through.
For a rustic touch, consider garnishing your serving board with fresh herbs, enhancing both the visual appeal and the flavor profile of your meal.
Storing and Enjoying Your Bread
To maintain the freshness of your artisan bread, store it in a paper bag at room temperature.
Avoid plastic bags, as they can trap moisture and make the crust soggy. If you have leftovers, consider slicing the bread and freezing it for later use.
Simply toast or warm the slices when you’re ready to enjoy them again, and they’ll taste just as delightful as when they were first baked.
Easy Artisan Bread Recipe
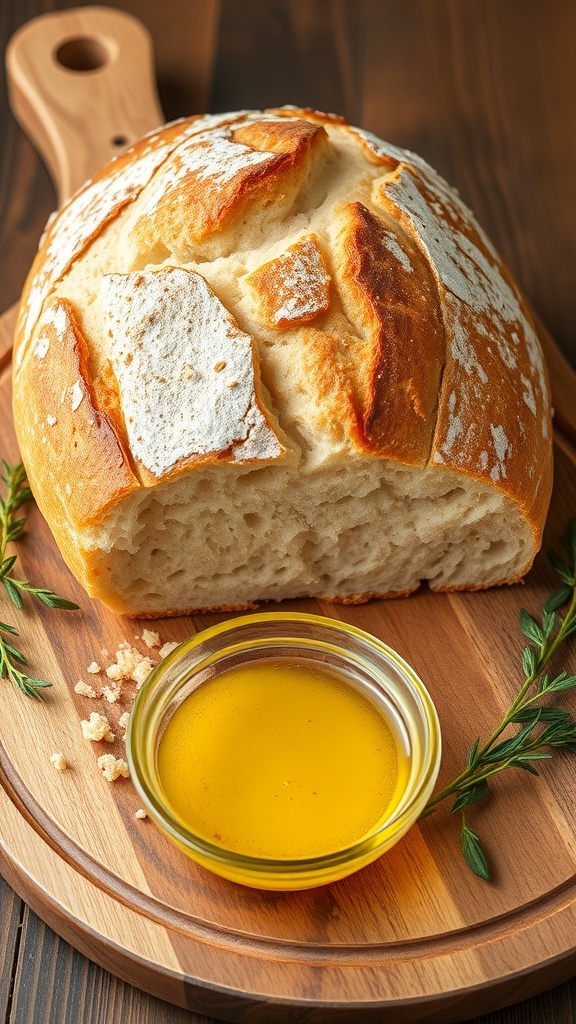
This artisan bread features a crispy crust and a tender crumb, achieved through a combination of high hydration dough and steam during baking. The recipe takes about 3 hours from start to finish, including rising time, and yields one large loaf.
Ingredients
- 3 cups all-purpose flour
- 1 1/2 teaspoons salt
- 1/2 teaspoon instant yeast
- 1 1/4 cups warm water
Instructions
- Mix the Dough: In a large bowl, combine the flour, salt, and yeast. Add the warm water and stir until a shaggy dough forms.
- First Rise: Cover the bowl with plastic wrap or a clean kitchen towel and let it rise at room temperature for 2 hours, or until doubled in size.
- Shape the Dough: Lightly flour a work surface and turn the dough out onto it. With floured hands, shape the dough into a ball and let it rest for 15 minutes.
- Second Rise: Place the dough seam-side down on a floured piece of parchment paper. Cover with a towel and let it rise for another 30 minutes.
- Preheat the Oven: About 30 minutes before baking, preheat your oven to 450°F (230°C) with a Dutch oven inside.
- Bake the Bread: Carefully remove the hot Dutch oven from the oven. Lift the parchment paper with the dough and place it into the pot. Cover with the lid and bake for 30 minutes. Remove the lid and bake for an additional 15-20 minutes, or until the crust is golden brown.
- Cool: Remove the bread from the pot and let it cool on a wire rack before slicing.
Cook and Prep Times
- Prep Time: 15 minutes
- Rise Time: 2 hours 30 minutes
- Bake Time: 45 minutes
- Total Time: 3 hours
- Servings: 12 slices
- Calories: 120kcal
- Fat: 0.5g
- Protein: 4g
- Carbohydrates: 24g