

The donut hair bun is a stylish and practical hairstyle that works well for various occasions, from casual outings to formal events. This easy-to-follow tutorial will guide you through creating a perfect bun using a hair donut.
With just a few simple steps and minimal tools, you can achieve a sleek and polished look that keeps your hair neatly styled throughout the day.
Understanding the Donut Hair Bun
The donut hair bun is a chic hairstyle that suits a variety of occasions, from casual outings to formal events. Its versatility makes it a popular choice for many, allowing individuals to achieve a polished look effortlessly.
This hairstyle not only keeps hair neatly styled but also adds an element of sophistication. With a few simple steps, anyone can master this elegant bun, making it a go-to option for busy days or special gatherings.
Essential Tools for Your Bun
Creating the perfect donut hair bun requires minimal tools. The key items include a hair donut, hair ties, bobby pins, and a hairbrush or comb. Optional items like hair spray can provide extra hold for those who need it.
The hair donut comes in various sizes, allowing you to choose one that best fits your hair length and desired bun size. Having the right tools on hand will streamline the process and ensure a neat finish.
Preparing Your Hair
Start with clean, dry hair. It’s important to brush through your hair to eliminate any tangles before you begin styling. This step will make the process smoother and help achieve a more polished look.
Gather your hair into a high ponytail, securing it with a hair tie. The height of your ponytail will determine where the bun sits on your head, so adjust accordingly based on your preference.
Creating the Bun
Once your ponytail is secured, slide the hair donut onto the base of the ponytail. Position it so that it sits snugly against your scalp. This will serve as the foundation for your bun.
Next, divide your hair around the donut and spread it evenly. Tuck the ends of your hair under the donut and secure them with bobby pins. This step is crucial for achieving a neat appearance, as it hides any loose strands.
Securing Your Style
After wrapping your hair around the donut, adjust the bun to ensure it looks even and secure. Use additional bobby pins as needed to hold everything in place. This will help maintain the bun’s shape throughout the day.
If desired, finish off your look with a light spray of hair spray for added hold. This optional step can help keep any loose strands in check, ensuring your hairstyle remains polished.
Styling Tips for Different Occasions
The donut hair bun is incredibly versatile. For a casual outing, you can leave a few strands loose around your face for a softer look. Alternatively, for formal events, keep the bun sleek and tight for a more sophisticated appearance.
Experiment with accessories like decorative pins or flowers to personalize your bun. This can add a unique touch, making it suitable for various occasions and personal styles.
Step-by-Step Guide to Creating a Donut Hair Bun
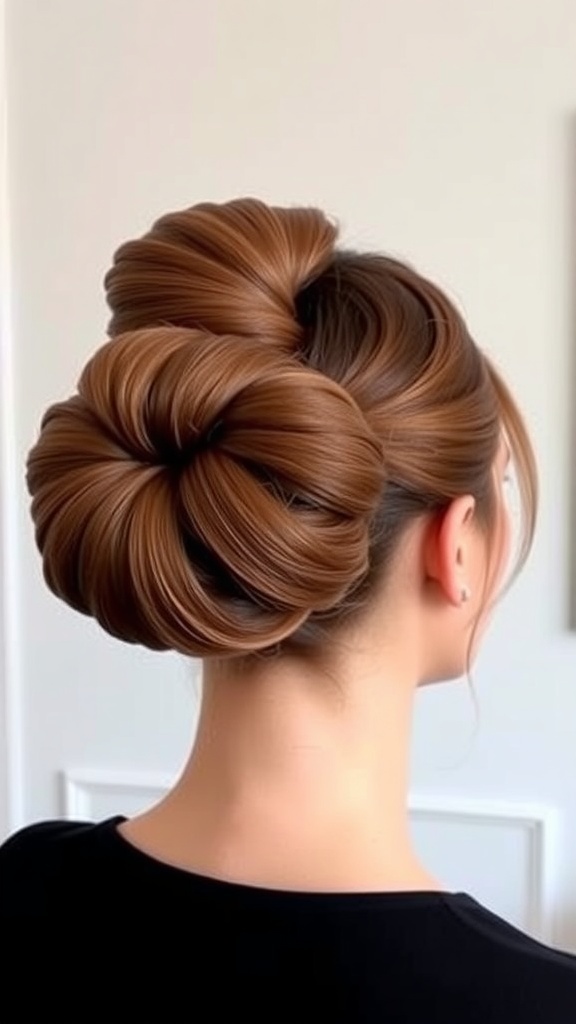
This tutorial provides a clear method for creating a donut hair bun, suitable for medium to long hair. The process takes about 10-15 minutes and is perfect for anyone looking to elevate their hairstyle effortlessly.
Ingredients
- 1 hair donut (available in various sizes)
- Hair ties
- Bobby pins
- Hairbrush or comb
- Hair spray (optional)
Instructions
- Prep Your Hair: Start with clean, dry hair. Brush through to remove any tangles.
- Ponytail: Gather your hair into a high ponytail and secure it with a hair tie. The height of the ponytail will determine the position of the bun.
- Insert the Donut: Slide the hair donut onto the ponytail, positioning it at the base.
- Wrap Hair Around: Divide the hair around the donut and spread it evenly. Tuck the ends of your hair under the donut and secure with bobby pins.
- Secure the Bun: Adjust the bun to ensure it’s even and secure. Use additional bobby pins as needed to hold it in place.
- Finish: Optionally, spray with hair spray for extra hold. Adjust any loose strands for a polished look.
Cook and Prep Times
- Prep Time: 5 minutes
- Total Time: 10-15 minutes