

This classic two-crust cherry pie is a delightful dessert that showcases the sweet and tart flavors of fresh cherries. Perfect for any occasion, this pie features a flaky crust that complements the juicy cherry filling beautifully.
The recipe is simple and requires basic baking techniques. You can use fresh or frozen cherries, making it a versatile option for year-round enjoyment.
Cherry Pie: A Timeless Dessert
Cherry pie holds a special place in the hearts of dessert lovers. Its combination of sweet and tart flavors creates a delightful experience for the palate. The vibrant red filling, often made from fresh or frozen cherries, bursts with juiciness, making each slice a treat.
This dessert is not just about taste; it also brings a sense of nostalgia. Many people have fond memories of baking cherry pie with family or enjoying a slice at summer gatherings. The aroma of a pie baking in the oven can evoke warm feelings and create a sense of comfort.
Creating the Perfect Crust
The crust is a crucial element of any pie, and a two-crust cherry pie is no exception. A flaky, buttery crust enhances the overall flavor and texture of the dessert. The process of making the crust involves mixing flour, salt, and sugar, then cutting in chilled butter until the mixture resembles coarse crumbs.
Adding ice water gradually helps to form a dough that is easy to handle. After chilling the dough, it can be rolled out and shaped to fit the pie pan. This step is essential for achieving that perfect golden-brown finish.
Preparing the Cherry Filling
The filling is where the magic happens. A blend of pitted cherries, sugar, cornstarch, lemon juice, and vanilla extract creates a luscious mixture that is both sweet and tangy. The cornstarch acts as a thickening agent, ensuring that the filling holds together beautifully when sliced.
Mixing the ingredients gently ensures that the cherries are evenly coated, allowing their natural flavors to shine through. This step is vital for achieving a well-balanced filling that complements the crust perfectly.
Baking to Perfection
Once the crust and filling are prepared, it’s time to assemble the pie. The bottom crust is filled with the cherry mixture, and a second layer of dough is placed on top. Cutting slits in the top crust allows steam to escape, which is crucial for preventing a soggy pie.
Baking the pie at the right temperatures is key to achieving that golden crust. Starting at a higher temperature helps to set the crust, while lowering the heat allows the filling to bubble and cook through. The result is a beautifully baked pie that is both visually appealing and delicious.
Serving Suggestions
Cherry pie is often best enjoyed with a scoop of vanilla ice cream or a dollop of whipped cream. The creaminess of the ice cream contrasts wonderfully with the tartness of the cherries, creating a delightful balance of flavors.
Serving the pie with fresh cherries on the side adds a touch of elegance to the presentation. Whether it’s for a family gathering or a special occasion, this dessert is sure to impress and satisfy any sweet tooth.
Storing and Enjoying Leftovers
If there are any leftovers, storing the pie properly is essential to maintain its freshness. Covering it with plastic wrap or aluminum foil can help keep it from drying out. Cherry pie can be enjoyed for several days, and some even say it tastes better the next day as the flavors meld together.
Reheating slices in the oven or microwave can bring back that freshly baked taste, making it a delightful treat any time of day. Whether served warm or cold, cherry pie remains a classic dessert that continues to bring joy to many.
Delicious Two-Crust Cherry Pie
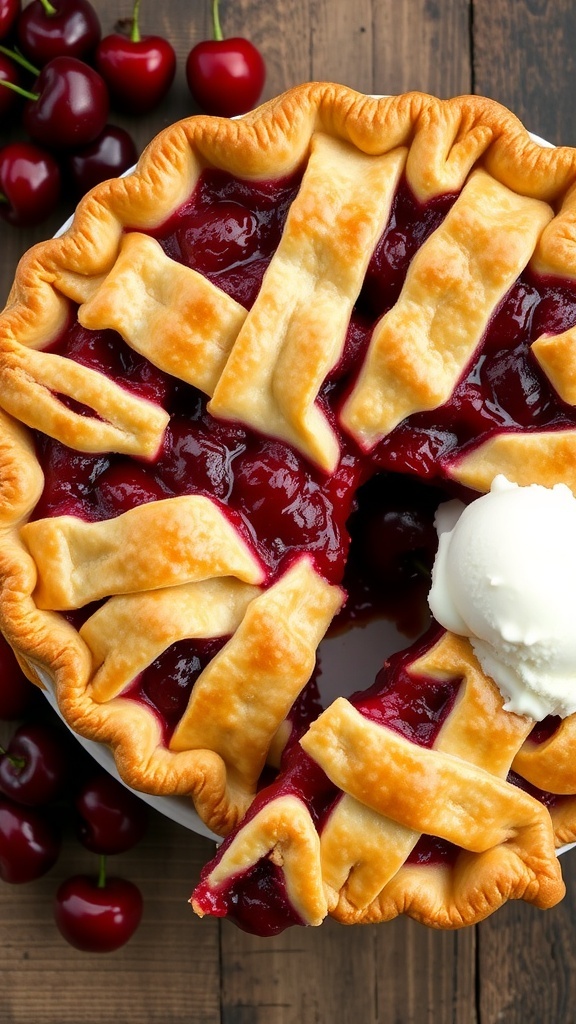
This cherry pie is made with a homemade flaky crust and a luscious filling of cherries, sugar, and a hint of lemon juice. The pie takes about 1 hour and 15 minutes from start to finish and serves 8 people.
Ingredients
- 2 1/2 cups all-purpose flour
- 1 teaspoon salt
- 1 tablespoon sugar
- 1 cup unsalted butter, chilled and diced
- 6 to 8 tablespoons ice water
- 4 cups fresh or frozen cherries, pitted
- 1 cup granulated sugar
- 2 tablespoons cornstarch
- 1 tablespoon lemon juice
- 1 teaspoon vanilla extract
- 1 egg, beaten (for egg wash)
- 1 tablespoon sugar (for sprinkling on top)
Instructions
- Make the Pie Crust: In a large bowl, mix the flour, salt, and sugar. Cut in the butter until the mixture resembles coarse crumbs. Stir in the ice water, a tablespoon at a time, until the dough forms a ball. Divide the dough in half, shape into discs, wrap in plastic, and refrigerate for at least 1 hour.
- Prepare the Filling: In a medium bowl, combine the cherries, sugar, cornstarch, lemon juice, and vanilla extract. Toss to coat the cherries evenly and set aside.
- Roll Out the Dough: Preheat the oven to 425°F (220°C). On a floured surface, roll out one disc of dough to fit a 9-inch pie pan. Place the rolled dough into the pan and fill with the cherry mixture.
- Top the Pie: Roll out the second disc of dough and place it over the filling. Cut slits in the top crust to allow steam to escape. Trim and crimp the edges to seal. Brush the top with beaten egg and sprinkle with sugar.
- Bake the Pie: Bake in the preheated oven for 15 minutes. Reduce the temperature to 350°F (175°C) and continue baking for an additional 30-35 minutes, or until the crust is golden brown and the filling is bubbly.
- Cool and Serve: Allow the pie to cool for at least 2 hours before slicing. Serve with whipped cream or vanilla ice cream if desired.
Cook and Prep Times
- Prep Time: 1 hour
- Cook Time: 30-35 minutes
- Total Time: 1 hour 15 minutes
- Servings: 8 slices
- Calories: 320kcal
- Fat: 15g
- Protein: 3g
- Carbohydrates: 45g