

Create a nostalgic holiday atmosphere with these fun and colorful 80s-inspired Christmas ornaments. This DIY project is perfect for adding a retro touch to your holiday decor, featuring vibrant colors and playful designs that capture the spirit of the decade.
Using simple materials, you can craft unique ornaments that reflect the bold style of the 1980s. Whether you’re decorating your tree or giving them as gifts, these ornaments will bring a cheerful vibe to your celebrations.
Creating a Nostalgic Holiday Atmosphere
Embrace the festive spirit by crafting vibrant 80s-inspired Christmas ornaments. This DIY project not only brings back memories of a colorful decade but also adds a unique flair to your holiday decorations.
With a mix of bright acrylic paints and glitter, these ornaments capture the essence of the 1980s. They are perfect for adorning your Christmas tree or gifting to friends and family, spreading cheer and nostalgia alike.
Materials Needed for Your DIY Ornaments
Gathering the right materials is essential for a successful crafting session. You will need clear plastic or glass ornament balls, which serve as the base for your creations.
Bright acrylic paints in various colors will be your primary tool for adding that iconic 80s vibrancy. Don’t forget the glitter, which will add a sparkling touch to your ornaments. Ribbons or string will be necessary for hanging them on your tree, while paintbrushes, scissors, and markers or stickers will help you personalize each piece.
Step-by-Step Crafting Process
Start by preparing your ornaments. Carefully remove the tops of the clear ornament balls and set them aside. This step is crucial for ensuring you can easily fill and decorate the inside.
Next, pour a small amount of acrylic paint into each ornament. Swirl the paint around to coat the interior. For a fun twist, consider using multiple colors to create a tie-dye effect.
Adding Sparkle and Personal Touches
Once the paint has dried, it’s time to add some glitter. Pour in your chosen glitter color and shake the ornament to distribute it evenly. This step will give your ornaments a dazzling finish that catches the light beautifully.
Now, let your creativity shine! Use markers or stickers to add fun designs or messages on the outside of the ornaments. This personalization makes each piece unique and special.
Final Assembly and Display
After decorating, reassemble the ornaments by replacing the tops. If needed, secure them with a hot glue gun to ensure they stay in place.
Finally, attach ribbons or string to the tops for easy hanging. Your colorful 80s-inspired ornaments are now ready to be displayed on your Christmas tree or shared as delightful gifts.
Setting the Scene for Your Ornaments
Once your ornaments are complete, create a festive display. Arrange them on a table surrounded by other holiday decorations, such as garlands, candles, or festive centerpieces.
Consider placing your decorated ornaments against the backdrop of a beautifully adorned Christmas tree, twinkling lights enhancing the overall festive atmosphere. This setting not only showcases your creations but also brings joy to all who see them.
Step-by-Step Guide to Making 80s Christmas Ornaments
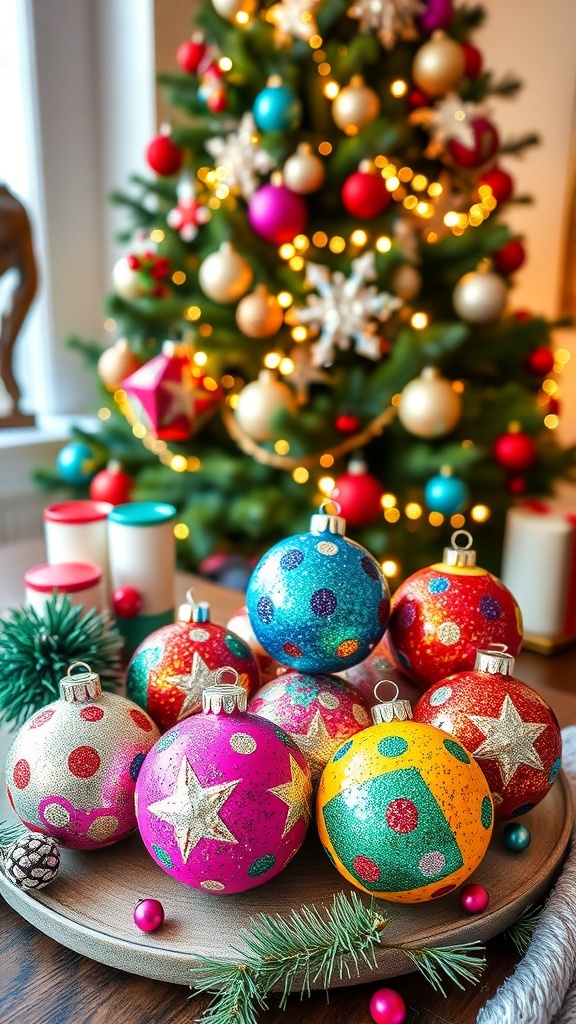
These DIY ornaments are made using common craft supplies like clear plastic balls, glitter, and colorful paints. The project is suitable for all ages and can be completed in about an hour, making it a great family activity during the holiday season.
Ingredients
- Clear plastic or glass ornament balls
- Acrylic paints in bright colors
- Glitter (various colors)
- Ribbons or string for hanging
- Paintbrushes
- Hot glue gun and glue sticks
- Scissors
- Markers or stickers for decoration
Instructions
- Prepare the Ornaments: Remove the tops of the clear ornament balls and set them aside.
- Add Color: Pour a small amount of acrylic paint into each ornament and swirl it around to coat the inside. You can use multiple colors for a tie-dye effect.
- Add Glitter: Once the paint is dry, pour in some glitter and shake the ornament to distribute it evenly.
- Decorate: Use markers or stickers to add fun designs or messages on the outside of the ornaments.
- Reassemble: Replace the tops of the ornaments and secure them with hot glue if necessary.
- Add Ribbons: Attach ribbons or string to the tops for hanging on the tree.
Cook and Prep Times
- Prep Time: 15 minutes
- Craft Time: 45 minutes
- Total Time: 1 hour