

Transform your old shirts into unique and festive Christmas ornaments with this simple DIY project. This eco-friendly craft not only repurposes fabric but also adds a personal touch to your holiday decorations.
The process is straightforward and requires minimal supplies, making it a fun activity for both adults and children. You can customize the ornaments in various shapes and styles to match your holiday theme.
Transforming Old Shirts into Festive Ornaments
Creating Christmas ornaments from old shirts is a delightful way to breathe new life into fabric that might otherwise go unused. This craft not only promotes sustainability but also allows for a personal touch in your holiday decor.
Gathering old shirts in various colors and patterns can spark creativity. The process is simple and enjoyable, making it a perfect project for families looking to bond over crafting. With just a few materials, you can turn forgotten garments into cherished decorations.
Materials Needed for Your Ornaments
To get started, you will need a selection of old shirts, scissors, and either a sewing needle with thread or a sewing machine. Fabric glue can be handy for those who prefer a no-sew option.
Additionally, having stuffing materials like cotton or fabric scraps will help give your ornaments a three-dimensional look. Ribbons or strings are essential for hanging your creations, while templates for shapes can guide your cutting process.
Crafting Your Unique Ornaments
The crafting process begins by selecting your favorite shirts and cutting them into desired shapes such as stars, hearts, or circles. This is where you can let your imagination run wild!
Once the shapes are cut, place two pieces of fabric together, ensuring the right sides are facing each other. Sew around the edges, leaving a small opening for stuffing. After turning the fabric inside out, fill it with your chosen stuffing to add dimension.
Finishing Touches for Personalization
After stuffing the ornaments, it’s time to close the opening by sewing it shut. This step ensures that your ornament holds its shape and looks polished.
To make your ornaments truly special, consider adding a loop of ribbon or string at the top for hanging. You can also embellish them with buttons, beads, or fabric paint, allowing for a unique flair that reflects your personal style.
Creating Memories While Crafting
This DIY project typically takes about 1.5 to 2.5 hours, making it an excellent way to spend an afternoon with loved ones. The joy of crafting together can lead to laughter and shared memories, all while creating beautiful decorations for your home.
As you hang these colorful ornaments on your tree or around your home, each piece will tell a story of creativity and togetherness, adding warmth to your holiday celebrations.
Displaying Your Handmade Ornaments
Once your ornaments are complete, consider how to display them. A rustic wooden table can serve as a charming backdrop, showcasing the vibrant colors and patterns of your creations.
Arranging the ornaments in a visually appealing way can enhance the festive atmosphere, making your home feel inviting and cheerful. Whether you choose to hang them on a tree or use them as table decor, these handmade treasures will surely bring joy to your holiday season.
Creative Christmas Ornaments from Upcycled Shirts
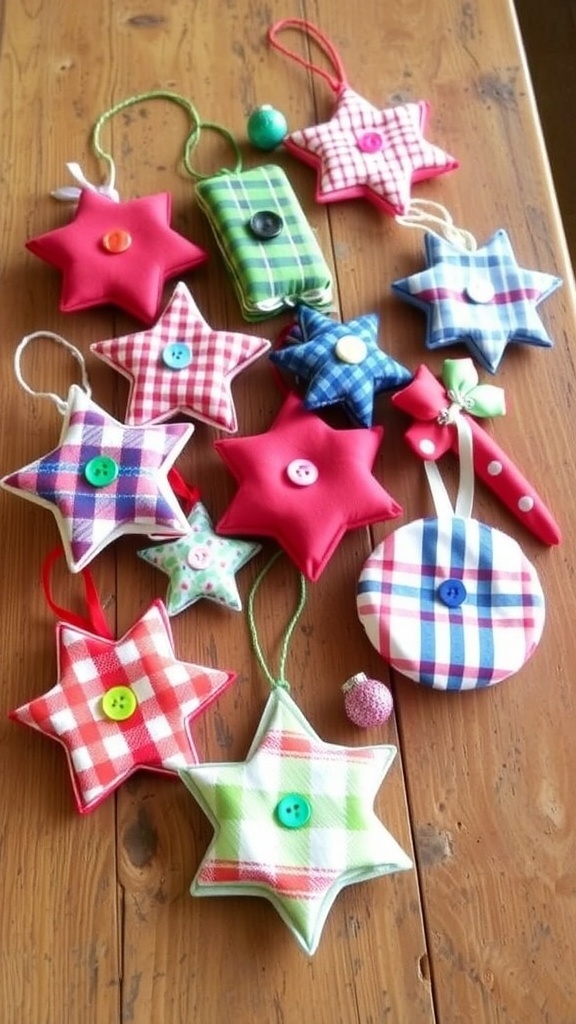
These DIY ornaments are made by cutting and sewing pieces of old shirts into decorative shapes. The project takes about 1-2 hours depending on the complexity of the designs and can be a great way to spend time with family while creating memorable decorations.