

This recipe focuses on creating the perfect bread crust and crumb, essential elements for a delicious loaf. A well-baked crust provides a satisfying crunch, while the crumb offers a soft and airy texture.
With simple ingredients and techniques, you can achieve a bakery-quality loaf at home. This guide will help you understand the importance of hydration, kneading, and baking times.
Creating the Perfect Bread Crust
The crust of a loaf is often the first thing that captures attention. A golden, crispy exterior not only looks appealing but also adds a satisfying crunch when bitten into.
Achieving this perfect crust involves a few key techniques. The right oven temperature is crucial; a hot oven helps to create steam, which contributes to that desirable crust.
Using a baking stone or preheated tray can also enhance the crust’s texture, ensuring it forms beautifully as the bread bakes.
Remember to let the bread cool properly after baking. This allows the crust to set, providing the ideal contrast to the soft crumb inside.
Understanding the Airy Crumb
While the crust is important, the crumb is what makes each slice delightful. A soft, airy interior is the hallmark of a well-baked loaf.
This texture is achieved through proper hydration and kneading. The dough must be moist enough to allow for the development of gluten, which gives the bread its structure.
Kneading the dough helps to strengthen this gluten network, resulting in a light and fluffy crumb.
The Role of Ingredients
Simple ingredients play a vital role in the bread-making process. All-purpose flour, warm water, and yeast are the foundation of any good loaf.
Each ingredient contributes to the overall texture and flavor. For instance, sugar not only feeds the yeast but also aids in browning the crust.
Salt is essential for flavor and helps to control yeast activity, ensuring a balanced rise.
Mastering the Kneading Process
Kneading is a critical step in developing the dough’s structure. It involves folding and pressing the dough repeatedly to strengthen the gluten.
This process typically takes about 10 minutes and should result in a smooth, elastic dough.
Pay attention to the dough’s texture; it should be slightly tacky but not overly sticky.
Rising Times and Techniques
Rising is where the magic happens. The first rise allows the dough to double in size, which is essential for achieving that airy crumb.
Covering the dough with a damp cloth helps retain moisture, creating the ideal environment for fermentation.
After shaping the dough, a second rise is equally important, allowing the loaf to puff up before baking.
Enjoying Your Freshly Baked Bread
Once the loaf is baked to perfection, the real enjoyment begins. Slicing into the bread reveals the fluffy interior, perfect for sandwiches or simply enjoying with olive oil.
The aroma of freshly baked bread fills the kitchen, creating a warm and inviting atmosphere.
Pairing the bread with a bowl of olive oil for dipping adds an extra layer of flavor, making each bite a delightful experience.
Perfecting Bread Crust and Crumb
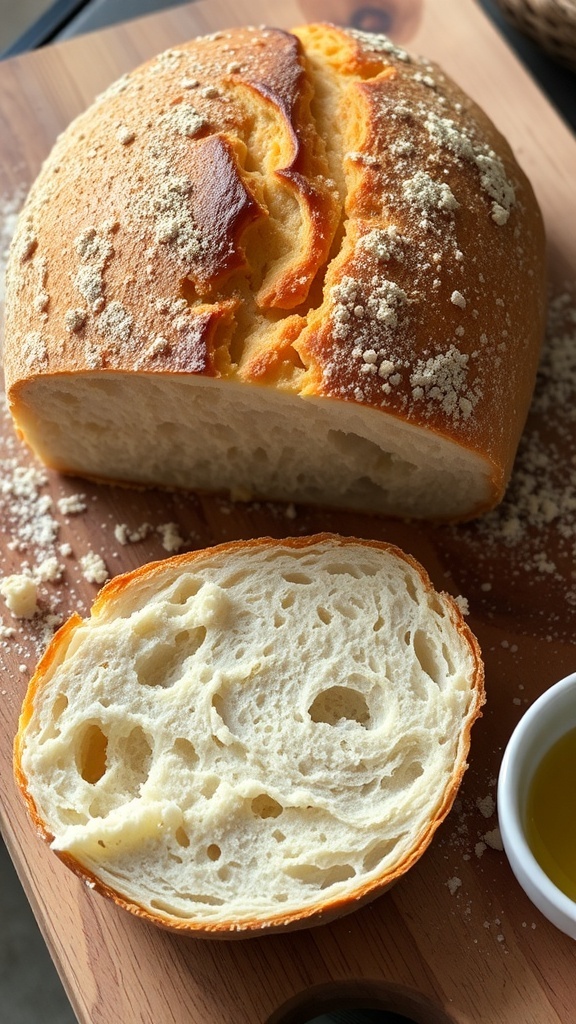
This bread recipe yields a crusty exterior and a light, airy crumb. It takes about 3 hours from start to finish, including rising time, and serves as a base for various toppings or sandwiches.
Ingredients
- 4 cups all-purpose flour
- 1 1/2 cups warm water (about 110°F)
- 2 teaspoons active dry yeast
- 1 tablespoon sugar
- 2 teaspoons salt
- 1 tablespoon olive oil (optional)
Instructions
- Activate Yeast: In a small bowl, combine warm water, sugar, and yeast. Let it sit for about 5-10 minutes until frothy.
- Mix Ingredients: In a large mixing bowl, combine flour and salt. Make a well in the center and pour in the yeast mixture and olive oil. Stir until a rough dough forms.
- Knead the Dough: Transfer the dough to a floured surface and knead for about 10 minutes until smooth and elastic.
- First Rise: Place the dough in a greased bowl, cover with a damp cloth, and let it rise in a warm place for about 1-2 hours, or until doubled in size.
- Shape the Dough: Punch down the risen dough and shape it into a loaf or round. Place it on a baking sheet lined with parchment paper.
- Second Rise: Cover the shaped dough and let it rise for another 30-60 minutes until puffy.
- Preheat Oven: Preheat your oven to 450°F (230°C). Place a baking stone or an empty baking tray in the oven to heat up.
- Bake: Once preheated, carefully place the dough in the oven. Bake for 25-30 minutes until the crust is golden brown and sounds hollow when tapped on the bottom.
- Cool: Remove the bread from the oven and let it cool on a wire rack before slicing.
Cook and Prep Times
- Prep Time: 30 minutes
- Cook Time: 30 minutes
- Total Time: 3 hours
- Servings: 12 slices
- Calories: 150kcal
- Fat: 1g
- Protein: 5g
- Carbohydrates: 30g