

This homemade crusty bread is a simple yet rewarding recipe that yields a delicious loaf with a crispy crust and soft interior. Perfect for sandwiches, toasting, or enjoying with butter, this bread is a staple in any kitchen.
The recipe requires minimal ingredients and basic techniques, making it accessible for both novice and experienced bakers.
The Allure of Freshly Baked Bread
There’s something truly special about the aroma of freshly baked bread wafting through the kitchen. The golden-brown crust, with its inviting texture, promises a delightful experience for anyone who takes a slice.
When you slice into a loaf, the soft, airy interior reveals itself, and steam rises gently, enhancing the anticipation of that first bite. This simple pleasure is one that can elevate any meal or stand alone as a comforting snack.
Ingredients That Make a Difference
The beauty of homemade crusty bread lies in its minimal ingredients. With just a few staples—flour, salt, yeast, and warm water—you can create a loaf that rivals those from the finest bakeries.
Each ingredient plays a vital role in developing the bread’s unique characteristics. The flour provides structure, while the yeast is responsible for the rise, creating that airy crumb we all love. Salt enhances flavor, making each bite more satisfying.
The Art of Bread Making
Baking bread is as much about technique as it is about ingredients. The process begins with mixing the dough, where you combine the dry ingredients and add warm water to form a shaggy mixture. This initial step is crucial for developing gluten, which gives the bread its chewy texture.
After mixing, the dough needs time to rise. This first rise allows the yeast to work its magic, doubling the dough’s size and infusing it with flavor. Patience is key here, as the longer rise contributes to a more complex taste.
Shaping and Second Rise
Once the dough has risen, it’s time to shape it. Gently turning it out onto a floured surface, you’ll form it into a ball, careful not to deflate it too much. This shaping process is essential for creating a nice structure in the final loaf.
The second rise is equally important. Placing the shaped dough on parchment paper and covering it allows it to puff up even more, ensuring a light and airy texture once baked. This step is often overlooked, but it’s vital for achieving that perfect crust.
Perfecting the Bake
Preheating the oven with a Dutch oven inside is a game changer for bread baking. This method traps steam, creating a crust that is both crispy and golden. When the dough is ready, it’s carefully placed into the hot pot, covered, and baked to perfection.
The initial covered baking allows the bread to rise further, while the final uncovered bake gives it that beautiful crust. The transformation from dough to bread is a sight to behold, and the smell that fills the kitchen is simply irresistible.
Enjoying Your Creation
Once the bread is baked, it’s crucial to let it cool completely on a wire rack. This cooling period helps set the crumb and prevents a gummy texture.
When you finally slice into your loaf, the soft interior beckons for a spread of butter, making each bite a warm, comforting experience. Whether enjoyed alone or as part of a meal, this homemade crusty bread is sure to impress.
Easy Crusty Bread Recipe
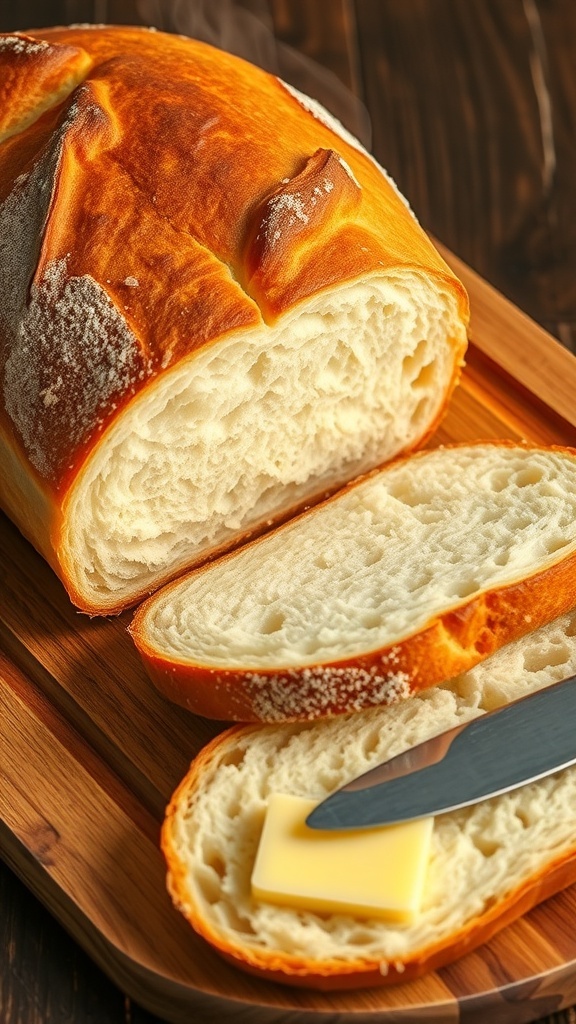
This crusty bread features a golden-brown crust with a chewy texture and airy crumb. The recipe takes about 3 hours from start to finish, including rising time, and yields one large loaf.
Ingredients
- 3 cups all-purpose flour
- 1 1/4 teaspoons salt
- 1/2 teaspoon instant yeast
- 1 1/2 cups warm water
Instructions
- Mix the Dough: In a large bowl, combine the flour, salt, and instant yeast. Add the warm water and stir until a shaggy dough forms.
- First Rise: Cover the bowl with plastic wrap or a damp cloth and let it rise at room temperature for 2 hours, or until doubled in size.
- Shape the Dough: After the first rise, turn the dough out onto a floured surface. Gently shape it into a ball without deflating it too much.
- Second Rise: Place the shaped dough on a floured piece of parchment paper. Cover it with a cloth and let it rise for another 30-60 minutes.
- Preheat the Oven: About 30 minutes before baking, preheat your oven to 450°F (230°C) with a Dutch oven inside.
- Bake the Bread: Carefully remove the hot Dutch oven from the oven. Lift the parchment paper with the dough and place it into the pot. Cover with the lid and bake for 30 minutes. Then, remove the lid and bake for an additional 15-20 minutes until golden brown.
- Cool: Once baked, transfer the bread to a wire rack to cool completely before slicing.
Cook and Prep Times
- Prep Time: 15 minutes
- Rise Time: 2 hours 30 minutes
- Bake Time: 45 minutes
- Total Time: 3 hours
- Servings: 12 slices
- Calories: 120kcal
- Fat: 0.5g
- Protein: 4g
- Carbohydrates: 24g