

This Nilla wafer crust is a simple and delicious base for various desserts, especially cheesecakes and pies. Made with crushed Nilla wafers, butter, and sugar, it adds a sweet, buttery flavor to your favorite treats.
The recipe is quick to prepare and requires minimal ingredients, making it a convenient choice for any baking project.
Creating the Perfect Nilla Wafer Crust
The foundation of any great pie starts with a well-crafted crust.
This Nilla wafer crust is not only simple to make but also adds a delightful sweetness to your dessert.
With just a few ingredients, you can create a crust that is both buttery and flavorful, setting the stage for the creamy cheesecake filling that follows.
To prepare this crust, you will need crushed Nilla wafers, melted butter, and a touch of sugar.
The combination of these ingredients results in a crust that is perfectly pressed into a pie dish, ready to hold your favorite fillings.
Steps to Achieve a Golden Brown Crust
Starting with the crust mixture, combine the crushed wafers, melted butter, and sugar in a mixing bowl.
Mix until the crumbs are evenly coated, ensuring that every bite has that rich buttery flavor.
Next, pour the mixture into a pie dish and press it firmly into the bottom and up the sides.
This step is crucial for achieving a sturdy crust that can hold up to the creamy filling and toppings.
Baking or No-Bake: Your Choice
Depending on your preference, you can choose to bake the crust or keep it as a no-bake option.
If you opt for baking, preheat your oven to 350°F (175°C) and bake the crust for about 8-10 minutes until it turns lightly golden.
For a no-bake version, simply refrigerate the crust for 30 minutes to allow it to set before adding your filling.
Both methods yield a delicious base that pairs beautifully with cheesecake or other sweet fillings.
Filling Your Crust with Creamy Cheesecake
Once your crust is ready, it’s time to fill it with a luscious cheesecake mixture.
The creamy filling complements the sweetness of the Nilla wafer crust perfectly, creating a harmonious blend of flavors.
After filling the crust, let it chill in the refrigerator to set.
This will help the cheesecake firm up, making it easier to slice and serve.
Finishing Touches: Berries and Chocolate
No dessert is complete without a little flair.
Top your cheesecake with fresh berries for a burst of color and flavor, and drizzle some chocolate sauce over the top for added decadence.
The combination of the creamy filling, crunchy crust, and vibrant toppings makes for a visually stunning dessert that is sure to impress.
Serve it on a rustic wooden table for an inviting presentation that beckons guests to indulge.
Serving and Enjoying Your Creation
When it’s time to serve, slice into the pie to reveal the beautiful layers inside.
The golden brown crust, creamy cheesecake, and fresh berries create an enticing display that is hard to resist.
Each bite offers a delightful mix of textures and flavors, making this dessert a favorite for gatherings or special occasions.
Enjoy the satisfaction of creating a dessert that not only looks amazing but tastes incredible too!
Easy Nilla Wafer Crust Recipe
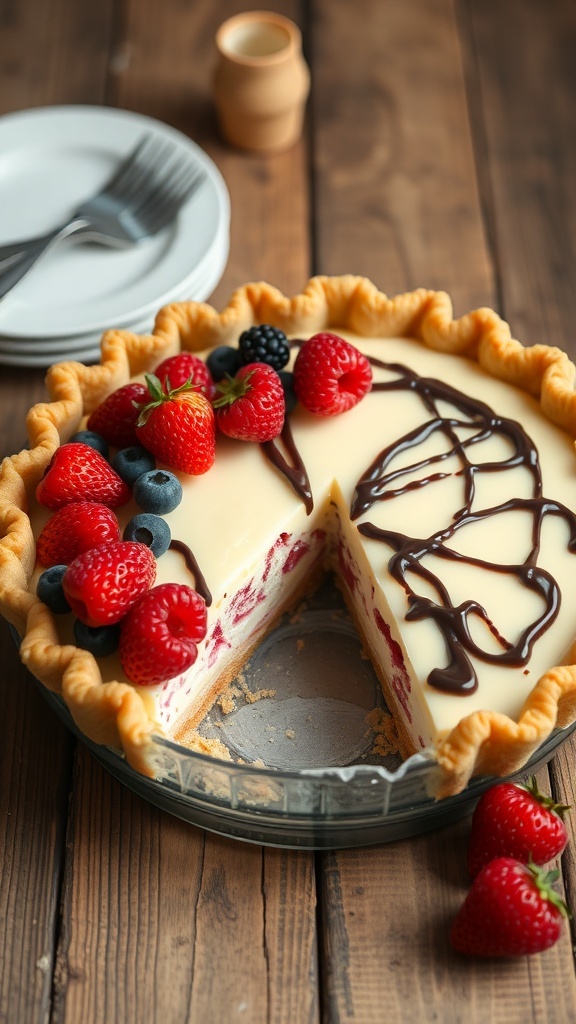
This crust features crushed Nilla wafers combined with melted butter and sugar, pressed into a pie dish. It takes about 15 minutes to prepare and can be baked or used as a no-bake crust, depending on your dessert needs.
Ingredients
- 2 cups Nilla wafers, crushed
- 1/2 cup unsalted butter, melted
- 1/4 cup granulated sugar
- 1/4 teaspoon salt (optional)
Instructions
- Preheat the Oven: If baking, preheat your oven to 350°F (175°C).
- Prepare the Crust Mixture: In a mixing bowl, combine the crushed Nilla wafers, melted butter, sugar, and salt. Mix until the crumbs are evenly coated.
- Press into the Pan: Pour the mixture into a 9-inch pie dish or tart pan. Press the crumbs firmly into the bottom and up the sides to form an even layer.
- Bake (optional): If baking, place the crust in the preheated oven and bake for 8-10 minutes until lightly golden. Remove and let cool before filling.
- No-Bake Option: If using as a no-bake crust, simply refrigerate the crust for 30 minutes to set before adding your filling.
Cook and Prep Times
- Prep Time: 5 minutes
- Cook Time: 10 minutes (if baking)
- Total Time: 15 minutes (plus chilling time if no-bake)
- Servings: 8 slices
- Calories: 150kcal
- Fat: 8g
- Protein: 1g
- Carbohydrates: 20g