

Creating beautiful pie crust designs can elevate your homemade pies, making them visually appealing and inviting. Whether you’re preparing a fruit pie, custard pie, or savory pie, a well-designed crust adds a personal touch.
This guide will cover various techniques for crafting decorative pie crusts, including lattice tops, cut-out shapes, and crimping methods. With a few simple tools and some practice, you can impress your family and friends with your pie-making skills.
Understanding Pie Crust Basics
Creating a pie starts with the foundation—the crust. A well-made crust is essential for any pie, providing both structure and flavor.
The basic ingredients include all-purpose flour, salt, sugar, butter, and ice water. Each component plays a vital role in achieving the perfect texture and taste. The flour gives the crust its body, while the butter adds richness and flakiness. Ice water helps bind the ingredients without melting the butter, ensuring a tender crust.
Essential Techniques for Crafting Crusts
There are several techniques to enhance the appearance of your pie crust. One popular method is the lattice top, which involves weaving strips of dough over the filling. This not only looks appealing but also allows steam to escape during baking.
Another option is to use cookie cutters for decorative cut-outs. These can be placed around the edges or on top of the filling, adding a personal touch to your pie. Crimping the edges with fingers or a fork gives a polished finish, making your pie look professionally made.
Preparing the Dough
The first step in making a pie crust is preparing the dough. Start by mixing the flour, salt, and sugar in a bowl. Next, incorporate the chilled butter, cutting it into the mixture until it resembles coarse crumbs.
Gradually add ice water, one tablespoon at a time, mixing until the dough comes together. Be careful not to overwork it; a gentle touch will yield a tender crust. Once combined, divide the dough into two discs, wrap them in plastic, and refrigerate for at least an hour.
Rolling and Shaping the Crust
After chilling, it’s time to roll out the dough. On a floured surface, take one disc and roll it out to fit your pie pan. Transfer the rolled dough to the pan, trimming any excess hanging over the edges.
With the second disc, you can create your desired design. For a lattice top, cut strips of dough and weave them over the filling. If you prefer cut-out shapes, use cookie cutters to create fun designs that can be placed on top or around the edges of the pie.
Baking the Perfect Pie
Once your pie is assembled, it’s crucial to bake it properly. Follow the specific baking instructions for your pie filling to ensure the crust turns golden and flaky.
Keep an eye on the pie while it bakes, as oven temperatures can vary. A perfectly baked pie will have a beautifully browned crust and a bubbling filling, signaling that it’s ready to be enjoyed.
Serving and Enjoying Your Creation
After baking, allow the pie to cool slightly before serving. This helps the filling set and makes slicing easier. Serve it warm or at room temperature, and consider pairing it with a scoop of vanilla ice cream or a dollop of whipped cream for an extra treat.
Whether it’s for a special occasion or a simple family gathering, a beautifully crafted pie will surely impress. The combination of a golden-brown lattice crust and a rich berry filling is not only a feast for the eyes but also a delight for the taste buds.
Techniques for Decorative Pie Crusts
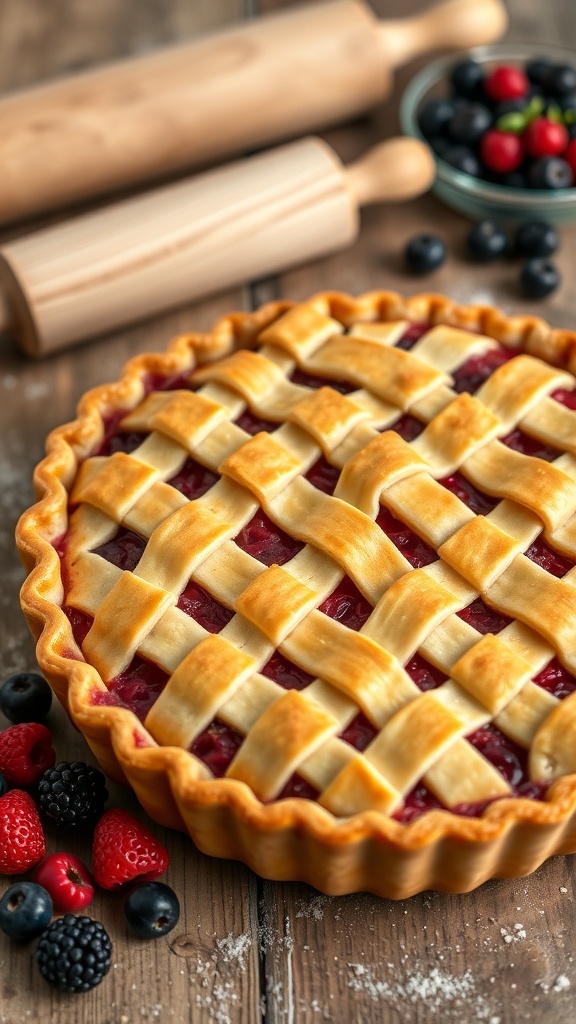
These pie crust designs can enhance the aesthetic of your pies while maintaining the delicious taste. The techniques discussed here are easy to follow and can be adapted to suit any pie recipe.
Ingredients
- 2 1/2 cups all-purpose flour
- 1 teaspoon salt
- 1 tablespoon sugar (optional)
- 1 cup unsalted butter, chilled and cubed
- 6-8 tablespoons ice water
Instructions
- Prepare the Dough: In a large bowl, mix flour, salt, and sugar. Add chilled butter and cut it into the flour until the mixture resembles coarse crumbs.
- Add Ice Water: Gradually add ice water, one tablespoon at a time, mixing until the dough comes together. Do not overwork the dough.
- Chill the Dough: Divide the dough into two discs, wrap in plastic wrap, and refrigerate for at least 1 hour.
- Roll Out the Dough: On a floured surface, roll out one disc to fit your pie pan. Transfer to the pan and trim excess dough.
- Create Designs: Use the second disc to create your desired design. For a lattice top, cut strips and weave them over the filling. For cut-out shapes, use cookie cutters to create decorative pieces.
- Crimp the Edges: Use your fingers or a fork to crimp the edges of the crust for a finished look.
- Bake: Follow your pie recipe’s baking instructions to ensure the crust is golden and flaky.
Cook and Prep Times
- Prep Time: 20 minutes
- Chill Time: 1 hour
- Total Time: 1 hour 20 minutes
- Servings: 2 pie crusts
- Calories: 1200kcal
- Fat: 90g
- Protein: 12g
- Carbohydrates: 90g