

Creating quilled Christmas ornaments is a delightful way to add a personal touch to your holiday decorations. This craft involves rolling and shaping strips of paper to form intricate designs that can be hung on your tree or used as festive decor.
The process is simple and requires minimal materials, making it a great project for both beginners and experienced crafters. You can customize your ornaments with various colors and shapes to match your holiday theme.
DIY Quilled Christmas Ornaments
Creating quilled Christmas ornaments is a delightful way to personalize your holiday decor. This craft involves rolling and shaping strips of paper to form intricate designs that can be hung on your tree or used as festive decorations.
The process is straightforward and requires minimal materials, making it suitable for both beginners and seasoned crafters. You can customize your ornaments with various colors and shapes to match your holiday theme.
Materials Needed
To get started on your quilled ornaments, gather the following materials:
- Quilling paper strips in various colors
- Quilling tool
- Glue (white craft glue or a glue pen)
- Scissors
- Tweezers (optional for precision)
- String or ribbon for hanging
Having everything ready will streamline the crafting process and allow you to focus on creating beautiful designs.
Creating Your Ornaments
Begin by preparing your materials and choosing the colors you want to use for your ornaments. The vibrant hues will add a festive touch to your creations.
Next, use the quilling tool to roll the paper strips into tight coils. Shape them into various forms like teardrops, circles, and hearts by pinching or bending the coils. This step is where your creativity can shine, as you experiment with different shapes and sizes.
Assembling Your Designs
Once you have created your basic shapes, it’s time to assemble your designs. Glue the shapes together to form your desired ornament design. Don’t hesitate to mix and match different elements to create something unique.
Adding a hanging loop is essential for displaying your ornaments. Cut a small piece of string or ribbon and glue it to the top of your ornament. This will allow you to easily hang your creations on the tree or around your home.
Drying and Displaying Your Ornaments
After assembling your ornaments, allow the glue to dry completely before handling them. This ensures that all parts are securely attached and ready for display.
Once dry, you can hang your quilled ornaments on your Christmas tree or use them as gift tags or decorations around your home. Their intricate designs and vibrant colors will surely bring a festive spirit to your holiday celebrations.
Creating a Festive Atmosphere
To enhance the charm of your quilled ornaments, consider displaying them on a rustic wooden table. Pair them with a soft, festive background of twinkling lights and evergreen branches. This setup creates a warm holiday atmosphere that complements the beauty of your handmade decorations.
As you craft and display your quilled ornaments, you’ll not only add a personal touch to your holiday decor but also create lasting memories with family and friends. Enjoy the process and let your creativity shine!
DIY Quilled Christmas Ornaments
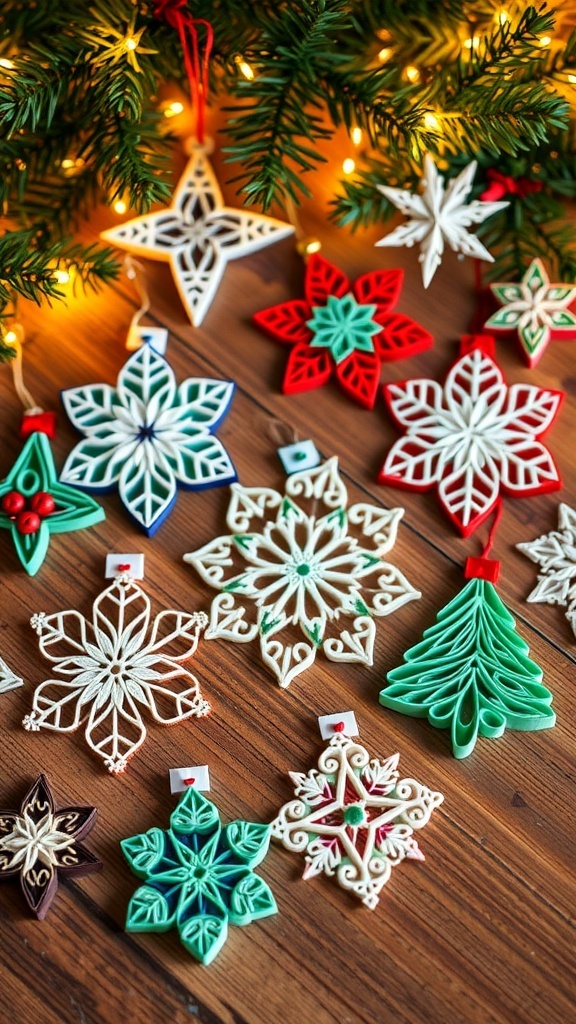
These quilled ornaments are made by rolling, shaping, and gluing paper strips into beautiful designs. The project typically takes about 1-2 hours to complete and can yield several ornaments, depending on the complexity of your designs.