

This guide provides a clear overview of Earth’s structure, focusing on the three main layers: the crust, mantle, and core. Understanding these layers is essential for studying geology and earth science.
The drawing process is straightforward and can be done with basic materials. This guide will help you create an accurate representation of Earth’s layers.
Understanding Earth’s Layers
Earth is composed of three primary layers: the crust, mantle, and core. Each layer has distinct characteristics and plays a vital role in the planet’s geology.
The crust is the outermost layer, relatively thin compared to the other layers. It is where we live and contains all terrestrial life. Beneath the crust lies the mantle, which is significantly thicker and semi-solid. This layer is crucial for the movement of tectonic plates and volcanic activity.
At the center of the Earth is the core, divided into two parts: the outer core, which is liquid, and the inner core, which is solid. Understanding these layers helps in grasping the dynamics of our planet.
Materials Needed for the Drawing
Creating a detailed drawing of Earth’s layers requires minimal materials. Gather the following items:
- Paper
- Pencil
- Colored pencils or markers
- Ruler (optional)
These materials will help you accurately depict the structure of the Earth in a colorful and engaging way.
Step-by-Step Drawing Process
Follow these simple steps to create your drawing of Earth’s layers:
1. Draw the Crust
Begin by sketching a thin layer at the top of your paper to represent the crust. This layer should be clearly defined, as it is the outermost part of the Earth.
2. Add the Mantle
Next, draw a thicker layer beneath the crust for the mantle. You can use shading techniques to indicate its semi-solid nature, making it visually distinct from the crust.
3. Illustrate the Core
At the center of your drawing, create two concentric circles. The outer circle represents the liquid outer core, while the inner circle signifies the solid inner core. Choose different colors for each to enhance clarity.
Labeling and Detailing
Once your drawing is complete, it’s essential to label each layer clearly. Write “Crust,” “Mantle,” “Outer Core,” and “Inner Core” next to their respective sections. This labeling will aid in understanding the structure of the Earth.
To make your drawing more appealing, use colored pencils or markers to add vibrant colors and details. This will not only beautify the artwork but also help in educational settings.
Time Required for the Drawing
The entire drawing process is quite efficient. Here’s a breakdown of the time required:
- Preparation Time: 5 minutes
- Drawing Time: 20 minutes
- Total Time: 25 minutes
This quick and straightforward process allows for a fun and educational activity that can be completed in under half an hour.
Educational Value of the Drawing
This drawing serves as a valuable educational tool for understanding Earth’s structure. It can be used in classrooms or at home to teach children about geology and earth science.
Visual representations like this drawing help reinforce learning by providing a clear and engaging way to understand complex concepts. By creating and labeling the layers, learners can better grasp the composition and dynamics of our planet.
Step-by-Step Drawing of Earth’s Layers
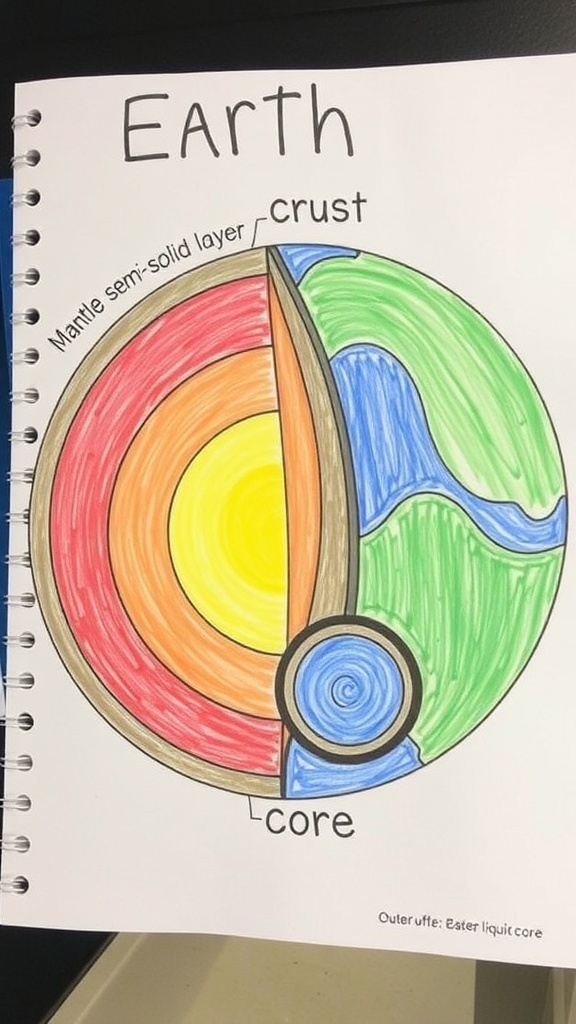
This drawing illustrates the Earth’s layers, showing the thin crust, the thick mantle, and the dense core. The crust is the outermost layer, followed by the mantle, which is semi-solid, and the core, which consists of a liquid outer core and a solid inner core.